Showing posts with label Pyramid studs. Show all posts

Wednesday, July 17, 2013

Pop Colours Series

New arrivals!

2- Prongs Pyramid Colour Pop Series

12mm by 12mm
In Lemon, Hot-Pink, Brilliant Blue, Teal, Ocean Mint

50studs for $4 (max. 2 colours)
200studs for $14 (max. 4 colours)


2- Prongs Pyramid Colour Pop Series (Glittered)

*LIMITED EDITION*
12mm by 12mm
In Hot-Pink with blue glitters

50studs for $5 
200studs for $18


Saturday, April 6, 2013

Cross Studded Earrings [sale post]

Cross Studded Earrings


A studs lover like us?
Adorn yourself with this pair of Cross Studded Earrings and grab a black studded bustier with a maroon fishtail skirt and black boots! Sounds like a perfect outfit yeah!

Get this now at $2.50 per pair!

2cm by 1.5cm
4 grams
In Silver and Gold

IN STOCK!
No waiting time!


SILVER

GOLD

To purchase:
SMS/WA us at 93698799 or email us at sales.diys@gmail.com

Thursday, February 28, 2013

DIY #7: Dip-dyed shorts


What you'll need:
- Shorts
- Pair of gloves
- Pail
- Dyes
- Salt
Duration: 1.5 hours

Level of difficulty: 3/5


Here's a close look on the dyes which I bought from Self-fix, Jurong Point outlet. They are $3.60 per dye and of 4.5g. #18 Windsor purple, #15 Madonna blue.

Step 1: Wet your shorts with cold water as they absorb the dye better when damp.


Step 2: Fill the pail with 1L of hot water, add the whole tin of dye, and 1 ounce of salt. The instructions on the dye was to use 500ml but I found it too little and decided to twice the volume. My first colour was purple for the bottom of the shorts. 


Step 3: Soak your shorts midway for about 1 minute and squeeze of the excess. This is after dying the bottom purple. The lighting cause the purple to look very bluish here. Injustice to the purple. :/

Step 4: Refill the pail was 1L of hot water and add blue dye and 1 ounce of salt. Dip the top part of the shorts into the dye. Leave in the dye for about 1 minute as well. The volume and salt can vary to how bright or light you would like the colours to turn out. Rinse off excess dye until water runs clear.


Step 5: Let the shorts dry before washing them.


Step 6: After washing the colour may drop a tiny bit, but the dip-dyed product is still DDG! 


AND VOLA! 
Paired the 'new' shorts with a plain base top to make it stand out LOUD! 

*added studs to my shorts which you can purchase them from me :)


Current mood: HAPPY! Super satisfied with my shorts and can't wait to wear them out! :D

Thanks for reading! 


Monday, January 28, 2013

DIY #5: Open Shoulder Top


What you'll need:
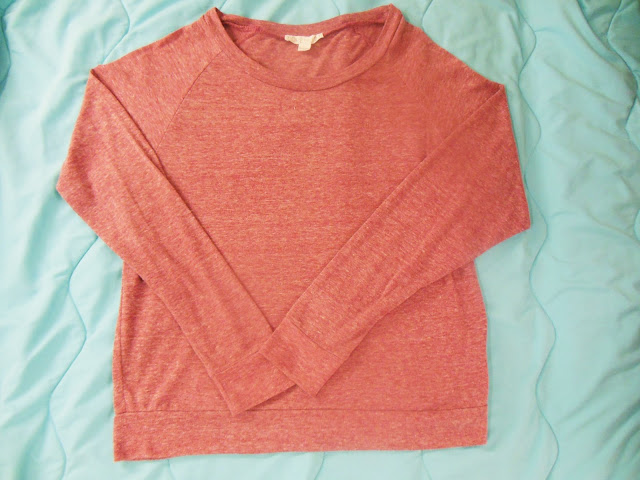
- Any sleeved top 
- A pair of scissors
- Fabric glue
- Type A Studs (Light Pink)
- Ruler

Duration: 1 hour

Level of difficulty: 1/5


Step 1: Find a long sleeved top. (Collared top looks great with open shoulders!)


Step 2: Flip the top inside out and cut an elongated semi-circle with a diameter of about 11cm. (White)
Snip 1cm at the ends of the semi-circle and at the tip. (Blue)


Step 3: Use fabric glue to seal the flap so it will look neater from the outside.


Step 4: Flip the top back to its original side and line the studs near edge of the opening.


For the front I used black studs and the back was light pink studs.

Final product of my DIY! 

I was quite surprised how well it looked after the DIY. From a simple plain long sleeve top it was transformed into something more unique and interesting. Can't wait to wear this out! 


Thanks for viewing!

Sunday, January 6, 2013

Hotfix Pyramid Studs

10mm Hotfix Pyramid Studs
50 studs per packet for $2.50 (1 colour)


Jazz up your clothes,shoes or accessories with these studs! 
Easy to handle with the help of a fabric glue to the underside of the stud. 
You can even paint or add more details to the studs! Let your creative juices go wild!

Colours available: Black, Gold, Light pink, White, Holographic silver, Silver
Dimensions: Apprx 10mm x 10mm x 10mm


White


 Light Pink


Holograhic Silver


Black 


Silver 


Gold


6 COLOURS TO CHOOSE FROM! (Colours more true to this photograph)

Monday, December 31, 2012

#3 DIY: STUDS ATTACK!

#3 DIY: Studs to denim shorts & collar of blouse 


#3 DIY: Studs to denim shorts

1. Grab any pair of plain shorts with minimal design.

2. Paste on studs using fabric glue. 

Close-up of studs

3. Paste studs on both edge of shorts.
 

Here's some other inspirations of studs on shorts.


#3 DIY: Studs on collar of blouse 

1. Plain collar

2. Position studs on collar before applying glue

3. Use fabric glue to stick studs onto collar. Usually white clothes goes well with gold or sliver studs.

  4. Do the same for the other collar! And you have your studded collar to spice up your blouse!


Few inspirations on collar studs!


#2 DIY: Studded pocket on plain top

This DIY require fabric glue and studs which can be purchased from me. I'll post u the details on the right sidebar real soon! :)


#2 DIY: Studded pocket on plain top

This is the final product after DIY, I added a pocket using the remaining denim from #1 DIY . Also, I added some white studs onto the denim pocket and placed it in such a way that it forms a 'S', which is my initial. 


1. Plain top

2. Denim from #1 DIY. Cut to desired pocket size and leave about 1.5cm border.

 3. The 1.5cm border has been folded in and secured temporarily with a needle at all sides. This is to make sewing easier. 

4. Sew short stiches using white threads of about <0.5mm away from the sides. Using fabric glue, apply it on the previous 1.5cm border and paste it on the clothes, remember not to apply to the top of the pocket unless you want an artificial sealed pocket. 

5. Using the fabric glue and studs, you can paste your studs in any arrangement   

TADDAAA! :)