Showing posts with label denim. Show all posts

Friday, March 29, 2013

DIY #9: OMBRE SHORTS


Ombre shorts are really gorgeous and some online shops are selling them at ridiculously high prices. Why not try making your own! 

This tutorial is very similar to DIY#7:Dip-dye shorts, the difference between the two post is that DIY#7 uses 2 colours/dye while DIY#9:Ombre shorts uses 1 dye and create a gradient from light to dark. 


BLEACHING
For denim shorts that are not white, we may have to carry out an extra step, and that's to bleach it. Only authentic denims are suitable for bleaching as they are able to withstand the chemical reactions and will not tear during the process. 

I placed my denim shorts into a pail and added bleach until my shorts is fully submerged. My shorts was placed in bleach for about 2 hours and it still had patches of green. After leaving overnight to dry, the green patches were gone and the shorts turned entirely white. 
**Do wear gloves and try to reduce any contact with bleach as it can cause skin irritation.


DYEING
 For white denims, we can start straight into the dyeing process! So here's what you will need!

What you'll need:
- Shorts
- Pair of gloves
- Pail
- Dyes
- Salt
Duration: 1 hour

Level of difficulty: 3/5


 Dylon dyes: 25 Emerald (Used this for the tutorial) and 33 Kingfisher
Bought from Selffix @ $3.60/dye


Dylon dye: 25 Emerald


Step 1: Add 70 grams of salt into a pail containing 2 liters of BOILING HOT WATER!!
**Please be careful! This dye works best in hot water, there's another type of dylon dye that only works well in  cold water, please check the label when buying the dyes.


 Step 2: I added a tiny amount of dye as I wanted the top to be a very light shade of green, close to white. Soak shorts for about 30 seconds.
**Add the powder dye as close to the water and not at a distance to minimize any potential wind or residue remaining at the wall of the pail.


 Step 3: Add slightly more dye into the pail and submerge only 1/4 of the shorts to the darker tone dye.
Leave shorts in dye for about 30 seconds and then squeeze off excess dye.
** Some colour will fade during the squeezing and washing step, so do soak longer if necessary.


 Step 4: Add slightly more dye into the pail and submerge only half of the shorts to the darker tone dye.
Leave shorts in dye for about 40 seconds and then squeeze off excess dye.
** Some colour will fade during the squeezing and washing step, so do soak longer if necessary.


Step 5: Add slightly more dye into the pail and submerge only the ends of the shorts to the darker tone dye.
Leave shorts in dye for about 1 minute and then squeeze off excess dye.
** Some colour will fade during the squeezing and washing step, so do soak longer if necessary.


Step 7: Leave shorts to dry entirely before washing. 
**At this stage the dye is very easily transferable to any material, do place a protective sheet below shorts if laying on the ground to dry.


After a wash, we have our green ombre shorts! You can add studs, draw, sew your shorts. And this ombre tutorial is not only limited to shorts but also you can try on plain dress, shoes, jackets, pull-overs and anything you like! 

TRY YOURS NOW!


SOME INSPIRATIONS!
*credits to Tumblr


Do not hesitate to email me at sales.diys@gmail.com if you have any questions regarding this tutorial. 
AND Hope you enjoyed this tutorial! :D

Tuesday, March 26, 2013

Tutorial #9 preview

ARE YOU READY FOR OMBRE SHORTS! 

TUTORIAL #9 will be up by this week! 

Stay tuned! 
Credits to pinterest

Wednesday, February 27, 2013

DIY #7 PREVIEW


HI LOVELIES! Dip-dye has become really trendy and we would like to join in the fun as well! Our first attempt was on a pair of shorts and 2 colours were used for this project. As soon as the first colour came out, we were so excited, and after dipping the next colour, we were in awe! This turned out way better as expected and we were so happy to what we saw! Can't wait to share this tutorial with you guys! 
Watch this space tomorrow night! 


New items in March!

New items in March!


Silver and bronze 16mm skull studs 
12mm Silver star studs
Drop dead gorgeous DIP-DYED HIGH  WAIST SHORTS!


1. Silver and Bronze skull studs (Type D)
16mm, 
2 prongs, 
10 studs for $3.50($2.80 now!) (20% off till 6th March)


2. Silver star studs (Type E)
12mm, 
5 prongs, 
20studs for $2.50 ($2 now!)  (20% off till 6th March)
50 studs for $5.50 ($4.40 now!) (20% off till 6th March)


3. Dip-dyed high waist shorts
26",28",30"
5 designs
Dip-dyed + studs
Price not available yet


Hurry make your reservations for the studs now! Early birds receive 20% off for type D and E studs!
 Designs of shorts will be up by 2nd week of March!

Thursday, February 21, 2013

#1: YAY OR NAY (12mm star studs)


12MM STAR STUDS

Should we bring in these?
YAY OR NAY.
If a YAY, do like at instagram, user: thediyroom
Thanks yall'! 


Wednesday, January 9, 2013

Sale post


Selling my DIY items!


High Waist Shorts 001
$22
Status: 1 piece (Brand new with DIY studs on pockets)
Colours: Grey and Blue
Size L : Approx width across waist: 15"
            Approx length down from waist: 12”
Fits UK 12/14


Yellow Ripped Shorts 002
$20
Status: 1 piece (Brand new with DIY studs on pockets)
Size L : Approx width across waist: 16"
            Approx length down from waist: 10”
Fits UK 12/14


To purchase: 
Add $1 for Normal Postage/$3.24 for Registered Postage
Email to sales.diys@gmail.com
Name: 
Item:

Monday, December 31, 2012

#2 DIY: Studded pocket on plain top

This DIY require fabric glue and studs which can be purchased from me. I'll post u the details on the right sidebar real soon! :)


#2 DIY: Studded pocket on plain top

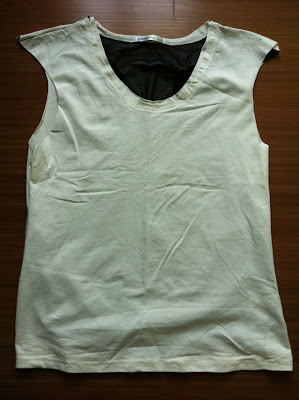
This is the final product after DIY, I added a pocket using the remaining denim from #1 DIY . Also, I added some white studs onto the denim pocket and placed it in such a way that it forms a 'S', which is my initial. 


1. Plain top

2. Denim from #1 DIY. Cut to desired pocket size and leave about 1.5cm border.

 3. The 1.5cm border has been folded in and secured temporarily with a needle at all sides. This is to make sewing easier. 

4. Sew short stiches using white threads of about <0.5mm away from the sides. Using fabric glue, apply it on the previous 1.5cm border and paste it on the clothes, remember not to apply to the top of the pocket unless you want an artificial sealed pocket. 

5. Using the fabric glue and studs, you can paste your studs in any arrangement   

TADDAAA! :)

Friday, December 21, 2012

#1 DIY: Jeans to shorts with bow pockets

Hey guys! Here's the step-by-step guide on how to alter your old pair of jeans to shorts with 2 cute little bow on the back pockets.


1. Flip jeans and draw a line with a pencil/chalk at where you intend to cut. 
    Ensure that its slanted to have a more flattering pair of shorts.
2. It's safer to have a longer pair as you can trim to desired length. 
3 & 4. Shorts can be worn in both ways.
5. By pulling out the excess white threads you'll get furry ends which makes the shorts more ragged. 
6. Cut a triangle at the corners of the shorts to make more leg room.
7. Using the excess denims, cut a rectangle that is about 2 cm wider then the width of the back pocket and 
     3/4 height of pocket. 
8. At one end, fold about 1cm inwards in a overlapping manner.
9. Do the same for the other end.
10. Create another fold in the middle.
11. From the excess denim, cut a strip of about 1.5cm width, 5cm length, to secure the bow.
12. Position the bow on the back pocket.
13. Tuck 1.5cm of the end of the bow inside and secure it with a needle at the top.
14. Sew the edge of the bow with short stitches.
15 & 16. Final outcome! 

Do share your DIY with me via email! I would love to see them.